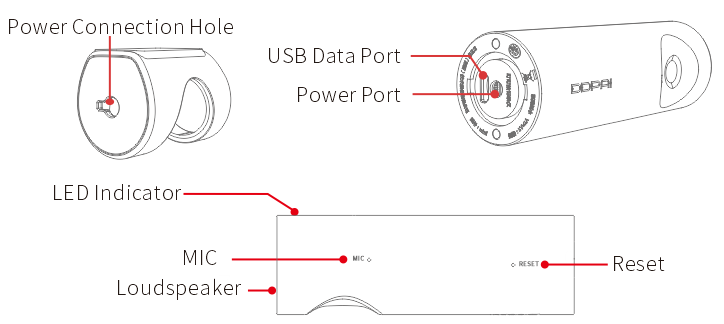

Dash Cam
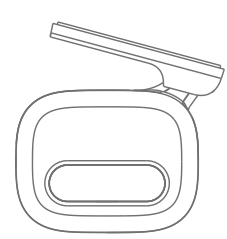
Mount
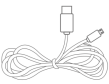
Power Cable

User Guide
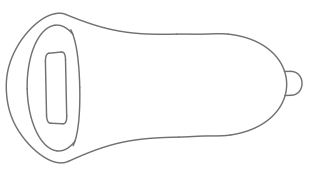
USB Charger

Installation Tool

3M Adhesive
1.Clean an area on the windshield where you wish the Dash Cam to be installed, this assists in adhesion.
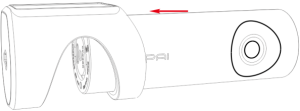
2.Gently push the Dash Cam into the bracket, you will hear a beep sound when it clicks into place.
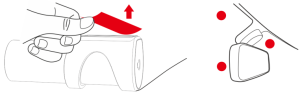
3.Remove the protective film from the back of the bracket, attach the adhesive side of the mount on the windshield where it has an unobstructed view of the road but does not interfere with the driver’s view. As shown below.
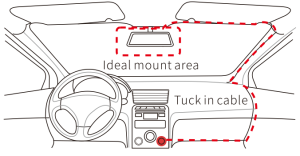
4.Use the installation tool to lift the edges of the windshield/molding and tuck in the power cable. Connect the Dash Cam to the car charger (plugged into cigarette lighter socket) and power cable.
5.Turn on the engine after installation, you will hear a boot tone, the Dash Cam powers up and starts recording, meanwhile, an LED indicator will blink slowly in normal mode.
6.Adjust the angle of the lens by rotating the Dash Cam. We recommend pointing the lens slightly downwards (≈10° below horizontal), so as to record video with a 6:4 road to background ratio. It is recommended to adjust the Dash Cam position while looking at the screen to select the best viewing angle.